Hello again!!! I'm so excited to share this new journey into the blog world with you! I've been contemplating starting a blog for some time now and I FINALLY decided to take the plunge, thanks to a lovely, sweet fellow crafter that so kindly walked me through my very first post. I'm so blessed to have met Michele (via telephone) and I encourage you to click here to take a look at her blog. She is so incredibly talented!! Her CAS cards are absolutely stunning. Wait, what am I saying? Most of you, if not all of you viewing this post right now, are here because of my wonderful new friend, Michele. You have all been so encouraging and welcoming. Your words make my heart smile. Thank you for you support. And thank YOU Michele for sending these lovely ladies my way!! I can't even tell you how grateful I'm feeling at this moment. I've never really done anything like this before so please, bare with me as I stumble my way through. I'm really looking forward to meeting fellow card makers/crafters, it's one of the main reasons I wanted to start a blog and I'm off to an amazing start! I've been making cards since March of 2015 (I know, I'm a total newb) and I'm loving every minute of it. I love everything about it. I've learned to watercolor, and ink blend, I get to color and emboss and stamp and ink smoosh and there's so many cool techniques that I've learned and so many still to learn. I do still have a family to attend to, but every free second I have, I'm in my craft room. So my plan is to post pictures of my latest cards and then describe how I made them. I also post video tutorials on my YouTube channel whenever I can so I hope you'll check that out as well. I do hope you'll follow along on this journey with me!! Ok, enough babbling.. Let's get to it!! This is the most recent card I've made.
I used Floral & Flutter by Concord & 9th for the butterfly and Hand Lettered Hello by WPlus9 for the Hello.
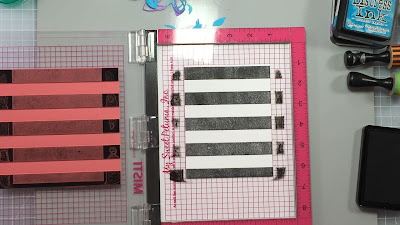
For this first card I thought it would be fun to make my own striped patterned paper so I used my Misti and the stamp called Wide Stripes by Simon Says Stamp.
For some reason, I had to stamp this 4 or 5 times in order to get good coverage, but I still really liked it.
I used Mermaid Lagoon and Wilted Violet distress inks to color the images and I LOVED this color combination!!
Check out that color up close!! Isn't it gorgeous?!!?
I thought about leaving parts of the die in tact just because I loved the color so much and wanted to see more of it, but in the end, I popped out all the pieces and just went with the intended shape. I really like this die. They're both beautiful shapes.
I felt like it needed something else so I added some thick 40 lb. vellum from Ellen Hutson. My all time favorite vellum, FYI... and left a little border around it.
I just recently purchased one of those mechanical embossers, I think they're called, and really wanted to use it, but I just wasn't feeling it for this particular card and this is when I decided to go with the Hand Lettered Hello die instead.
Then I just added some silver thread behind the butterfly and those cool little clear water drop looking thingies (I think that's their official name) and a strip of silver glitter paper to tie in with the silver "Hello" greeting and called it a day!!! Well, no, I didn't actually ... I decided to make another card while I had everything there at my fingertips. I hadn't used the 2 flowers that I cut out and colored so I started off with those and came up with this!!
The black and white striped background isn't quite the same as the first card because I didn't use a stamp and it isn't a patterned paper... For this card I used the Classic Stripe Cover die by Mama Elephant. I absolutely LOVE this die!! I can have a striped background whenever I want and in what ever color I want!! I would say this die is on my Must Have list. I used a different Hello die, this one is called Painted Hello by Simon Says Stamp.
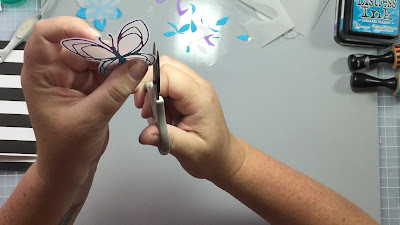
I wanted to use the same elements for this card so I traced around the butterfly onto the vellum and after cutting it out, I rubbed Versa Mark all along the edge and then dipped it in silver embossing powder. I had never done this before, and I wasn't quite sure about it when I first did it, but after I wiped some of the excess off and heat set it, I was actually pretty happy with it!!
I wasn't quite sure how to attach the butterfly without adhesive being visible so as I was looking through my bin of embellishments, I came across a bunch of these little clothes pins and I instantly knew that was it!! You wouldn't see any adhesive because I wasn't going to put any adhesive on it!!
Again, I added some silver thread behind the butterfly and attached these beautiful silver rhinestones and more of the clear, water drop looking thingies and I had myself a card!!! Thank you for taking a look at my cards today!! I'm hoping to have a step by step tutorial for these on my YouTube channel by the end of the weekend (but more realistically by mid-week) so I hope you'll pop on over there and check that out as well. Once I have it uploaded, you will be able to click Here and it will take you right to it.
And.... that's a wrap!! Off to enjoy dinner with my in-laws tonight. They're in town for the weekend to beat the heat. It was 116 degrees in Lake County yesterday, can you believe that?!? It's been really nice here for the past few days, but our max temp is more like 75 degrees. One of the many reasons I love my hometown.
Ok, I'm REALLY going this time!! Have a great rest of your weekend and I hope to see y'all soon!!! God Bless ~


